Solar Panel Roof Mounting Bracket

Solar panels are a great way to power your camper van with renewable energy. They can charge your batteries, run your appliances, and reduce your dependence on the grid. But how do you mount a solar panel on your camper van roof? Here are some steps and tips to help you with this project.
Making the right choice
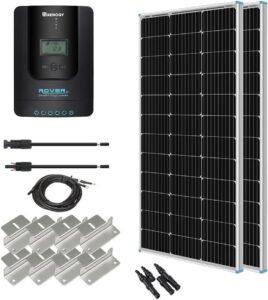
Choose the right solar panel kit for your needs. There are different types of solar panels, such as monocrystalline, polycrystalline, and flexible. You also need to consider the size, power, and voltage of the panels, as well as the accessories that come with the kit, such as a charge controller, an inverter, and wiring. A good option is the Renogy 200-Watt Premium Solar Kit, which includes two 100-watt panels, and a 20-amp MPPT charge controller.
Location
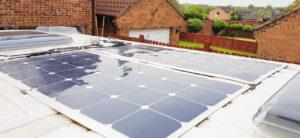
Decide where to place the solar panels on your roof. You want to maximize the exposure to sunlight, avoid shading from other objects, and minimize wind resistance. You also need to consider the shape and size of your roof, and how much space you have for mounting brackets and wiring.
Mounting
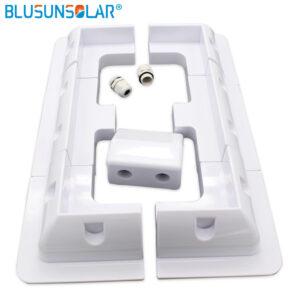
Attach the solar panel roof mounting brackets to your roof. These are metal or plastic devices that hold the panels securely on the roof. You can either use adhesives or hardware to attach them, depending on your roof material and preference. If you use adhesives, make sure to clean the area with acetone or something similar to ensure a good bond. If you use hardware, make sure to tighten all nuts and bolts and use lock washers.
The Wires
Wire the solar panels together in series or parallel, depending on your system configuration. Series wiring means connecting the positive terminal of one panel to the negative terminal of another, which increases the voltage but keeps the current constant. Parallel wiring means connecting all the positive terminals and all the negative terminals together, which increases the current but keeps the voltage constant. Use connectors and fuses to join the wires safely and securely.
The bit most folk hate
Drill a hole in your roof for the wires to enter the van. Choose a location that is close to where you want to install the charge controller and battery bank inside the van. Use a drill bit that matches the size of your wires, and file down any sharp edges. Use a rubber tubing or plastic wire loom conduit to protect the wires from abrasion and water damage.
Keeping the water out
Weatherproof the hole with a waterproof entry gland or sealant. This is a device that prevents water from leaking into the hole and damaging your wires or van interior. You can either buy one online or make one yourself with PVC plumbing fixtures and adhesive sealants.
The technical stuff
Install the charge controller, battery bank, and inverter inside the van. The charge controller regulates the power from the solar panels to the batteries, preventing overcharging or undercharging. The battery bank stores the power for later use and can be made of different types of batteries, such as lead-acid or lithium-ion. The inverter converts the DC power from the batteries to AC power for your appliances. Follow the manufacturer’s instructions for each component, and make sure they are placed in a dry, ventilated, and secure area.
Connect the wires from the solar panels to the charge controller, then connect the charge controller to the battery bank, then connect the battery bank to the inverter8. Always follow the correct order of connection and disconnection, and use proper wire sizes and circuit breakers for safety.
Finally
Test your system and enjoy your solar power! Check if everything is working properly by using a multimeter or a display screen on your components. Make sure there are no sparks, shorts, or overheating issues. Adjust your settings if needed, and monitor your system regularly.
Congratulations! You have successfully mounted a solar panel on your camper van conversion! Now you can enjoy free and clean energy for your van life adventures!


